Unless you’ve been a social media recluse for the last few months, you probably already follow @mmmmitchell and if you don’t, you should! In my job as an Influencer Marketing Assistant at BEAUTY BAY I get to work closely with Mitchell, and last month I was lucky enough to go to his masterclass in Liverpool.
Scroll down for the low down on everything I learnt and how I put my new-found artistry skills to the test.
Step One: The Base
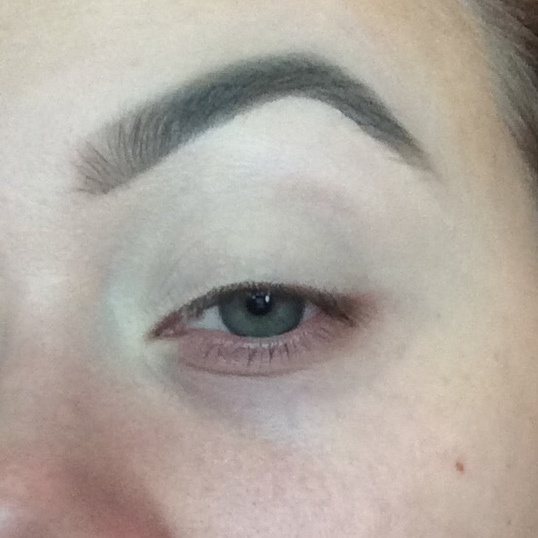
After doing my brows and applying a little concealer to my brow bone and lid, I applied the an eye base all over my lid with a concealer brush – this helps the shadows stick to the lid and last all day. Mitchell explained that you shouldn’t set the base with a powder as the darker more vibrant shadows won’t have anything to stick to (this is one of his secrets to getting the most vibrant looks!). Another thing he advised is to do both your primer and shadow on one eye before moving onto the other eye. This ensures that the base stays sticky.
Step Two: The Crease
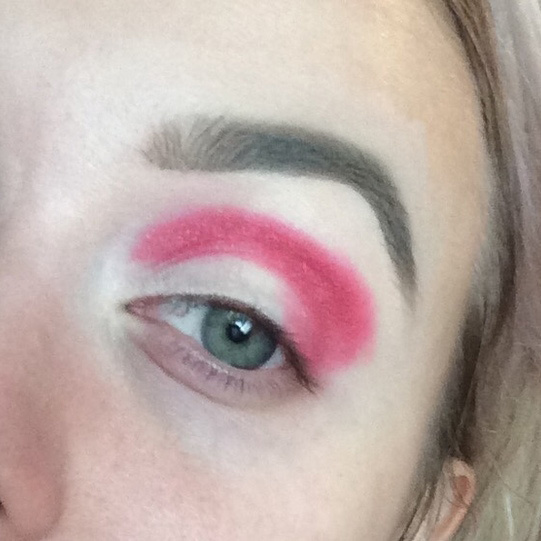
Okay, so this part was way out of my comfort zone… Mitchell advised to start applying the main crease colour with a small blending brush. This is going to place the colour exactly where you need it for a really intense look. In my normal routine I usually blend out a transition shade and work from lightest to darkest, but Mitchell’s technique flips this by going from dark to light. When placing the colour I was told not to worry about blending, and to focus on the placement of the shade in the 3 sections of the crease – outer, middle and inner, working on each section to get the saturation right first.
Step Three: Transition

Next, I took my transition shade on an equally small blending brush and really lightly blended out the crease colour. I used really small motions and traced the outside of the crease shade before blending out. Mitchell loves taking shadow right up to the brow bone as you get more room to play with colour.
Step Four: Add Depth
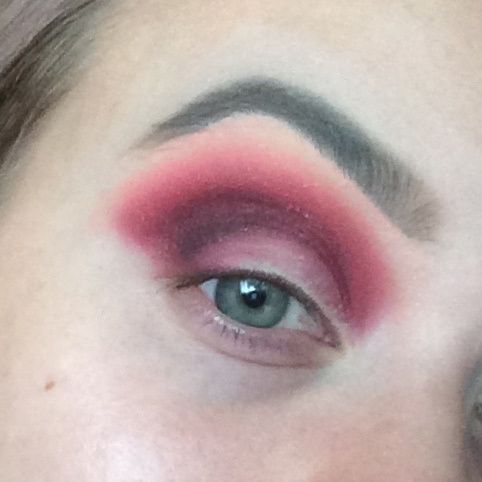
Here I went in with my darkest shade – again I blended it through my crease using small back and forth motions. It’s important to get the depth before you cut the crease so there will be enough of a contrast in colour to create a striking finish.
Step Five: Cut The Crease
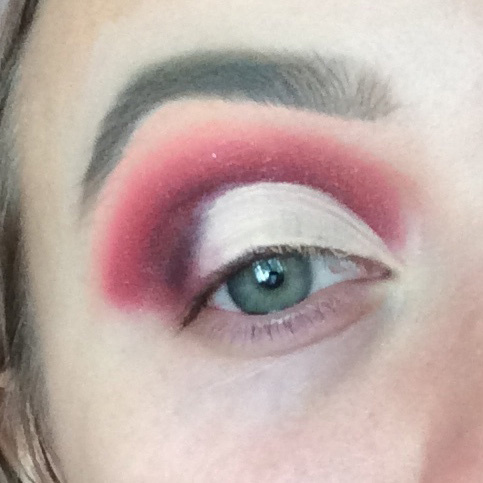
For this step Mitchell used the base shade again on a small concealer brush. His top tip was to apply to the lid and look up – this transfers the base shade to the top lid, creating a guide on where to cut. If you feel you need more definition he recommended going in with a tiny pencil brush and outlining the cut crease with your darkest shade.
Step Six: Lid Colour
For the lid Mitchell took his brightest shade and packed it onto the lid (over the base shade) using a stamping motion. This makes sure the colour is packed on – again for maximum pigmentation.
Step Seven: Finishing Touches

I finished with Tiggy Lashes in Susan – such a bold eyeshadow needs a big lash to balance it out! I also took the eyeshadow along my lower lash line, following the same steps as earlier – starting with the main colour then transitioning it out before defining. Any other finishing touches like adding depth and definition was also done as this stage.
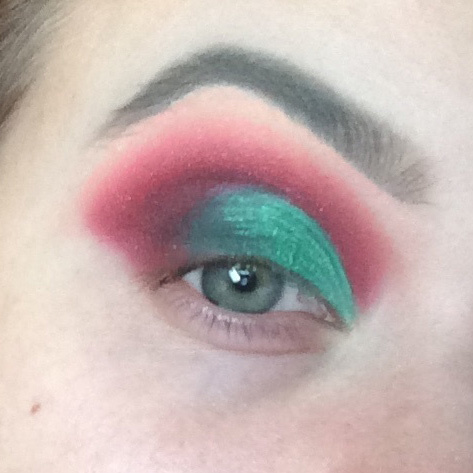
The Final Look
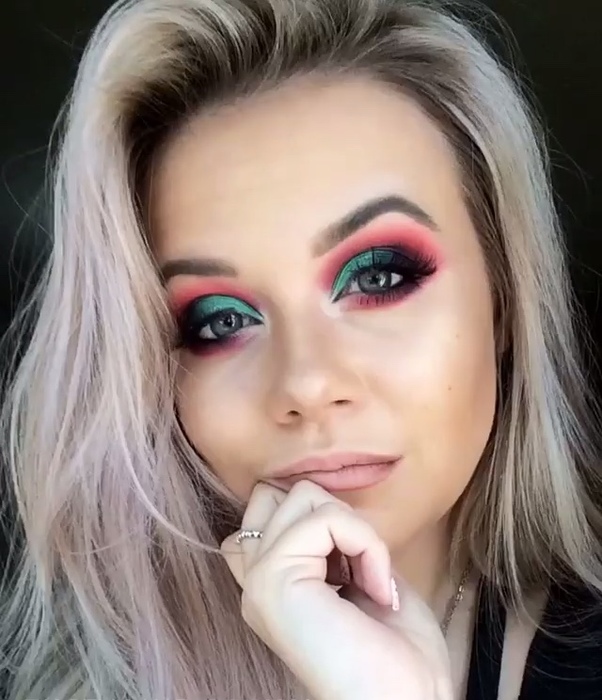
This was a totally different way of doing makeup for me and I feel I learnt so much at the class – there are techniques that worked so well. I can safely say they’ve changed how I do my makeup completely. Thanks so much Mitchell for having me, I can’t wait for the next one!